Ultrasound-Guided Internal Jugular Vein Catheterization, Catheterization of Internal Jugular Vein, IJ Line, Internal Jugular Central Line, Jugular Vein Catheterization
- See Also
- Indications
-
Sepsis catheter
- PreSep Central Venous Oximetry Catheter for ScvO2
- Venous access
- Indicated when unable to obtain peripheral venous access
- Consider Ultrasound-Guided Antecubital Line
- Emergency Resuscitation
- Indicated when unable to get rapid peripheral access
- Consider Intraosseous Access instead
-
Central Venous Pressure Monitoring (CVP Line)
- Consider Ultrasound assessment of volume status instead
- Temporary venous pacing
- Contraindications
-
Coagulopathy (relative contraindication)
- Compressible sites may be considered (e.g. in this case the internal jugular)
- Contralateral Pneumothorax or Hemothorax
- Do not place a Central Line on the "good side" opposite a compromised lung
- Applies most to Subclavian Line placement
- Pneumothorax can however still complicate internal jugular catheterization
- Internal jugular thrombosis
- Pre-scan the internal Jugular Veins prior to catheterization (identify thrombosis)
- Morbid Obesity (relative contraindication)
- Internal jugular landmarks are more difficult in the morbidly obese
- Adverse Effects
- Infectious complications
- Cellulitis at insertion site
- Line Sepsis
-
Lung complications
- Pneumothorax
- Hemothorax
- Chylothorax (left-sided IJ)
- Cardiovascular complications
- Carotid Artery puncture
- Air Embolism
- Hematoma
- Vessel Laceration or dissection
- Catheter embolism
- Deep Venous thrombosis (DVT)
- Arrhythmia (guidewire or catheter irritation of Myocardium)
- Technical complications
- Failed placement
- Guidewire lost, broken or coiled
- Neurologic complications
- Phrenic Nerve injury
- Recurrent Laryngeal Nerve injury
- Technique
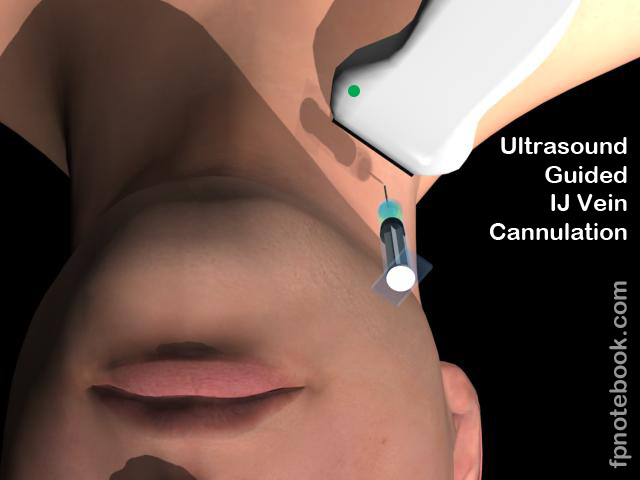
- Ultrasound Guidance of right Internal Jugular Line
- Preparation of Ultrasound Machine
- Linear array transducer (frequency 7.5 to 10 MHz)
- Transducer Orientation
- Typical: Short access (transverse) with indicator toward left (patient's 3:00 position)
- Alternative: Oblique
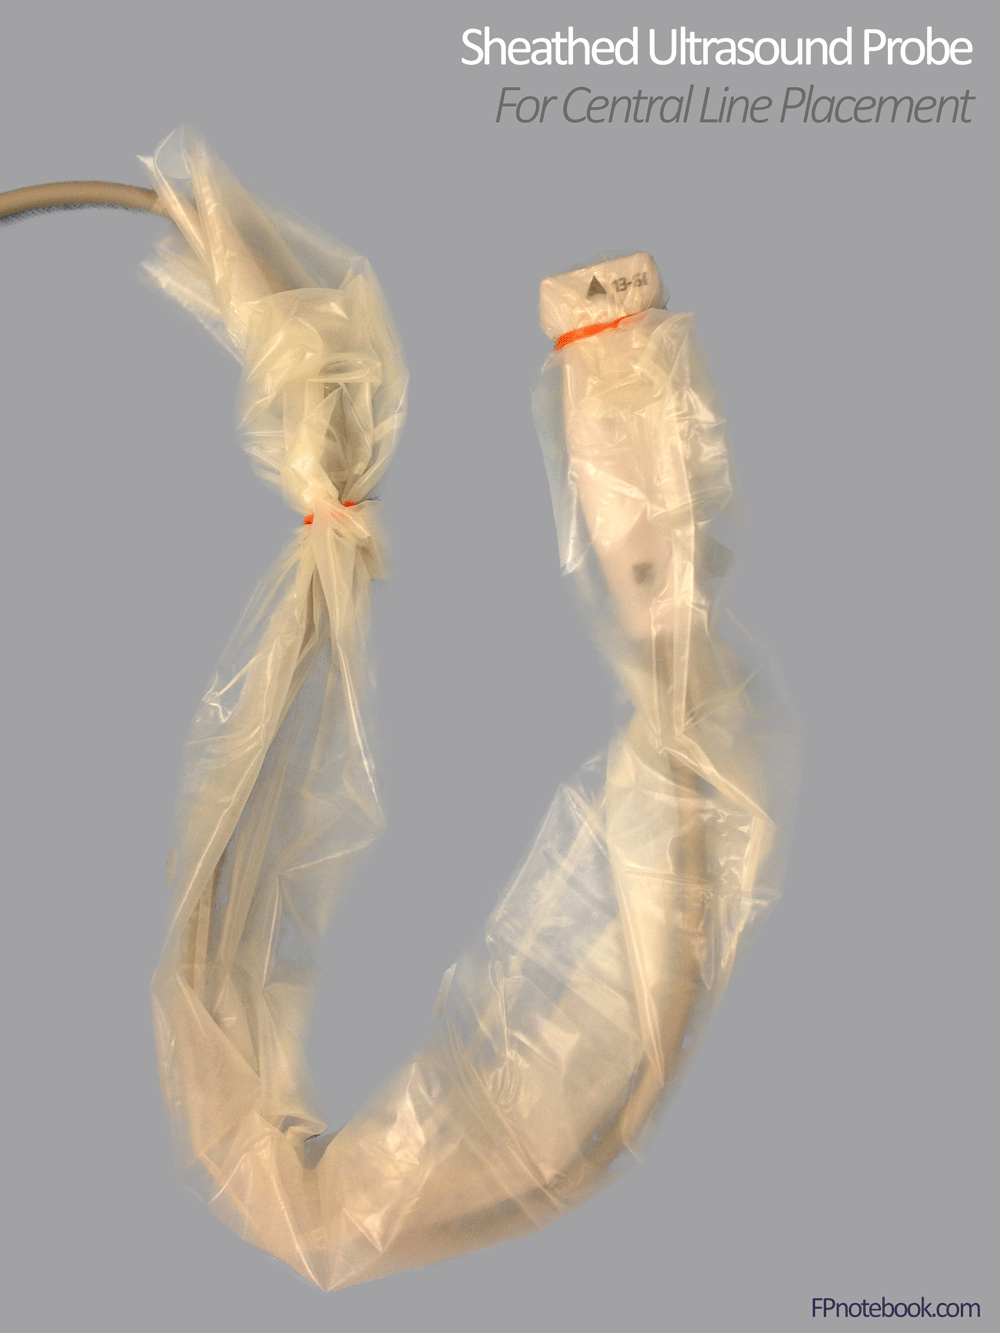
- Ultrasound transducer/probe sterile cover (accordian folded)
- Sterile gel
- Sterile Rubber bands (2) to fix cover around the transducer
- Images
- Pre-scan neck with Ultrasound
- Apply non-sterile gel to Ultrasound probe
- Probe in transverse (short access) orientation with indicator towards patient's 3:00 position or left side
- Probe should remain perpendicular to skin surface (until following needle entry)
- Start over trachea and slide laterally over Thyroid onto carotid and then internal jugular
- Positions probe with most medial view of vessels which separates the vessels optimally
- Lateral approach often overlaps the vessels
- Apply gentle pressure with the probe to avoid compressing the internal Jugular Vein
- Slowly move the transducer down the neck, over the course of the internal jugular, toward the right clavicle
- Internal Jugular Vein localization
- Internal jugular is lateral and anterior to the Carotid Artery in most cases (right side of screen)
- Internal Jugular Vein is typically much larger diameter than Carotid Artery
- IJ vein increases in diameter with valsalva, trandelenberg position or abdominal applied pressure
- Internal Jugular Vein will compress with skin pressure or neck extension
- Doppler flow can be used if necessary to distinguish internal Jugular Vein from the Carotid Artery
- Position the internal Jugular Vein in the center of the monitor
- Length of central venous catheter
- Should be at least 1.4 times the measured depth of the internal Jugular Vein
- Based on insertion angle of 45 degrees
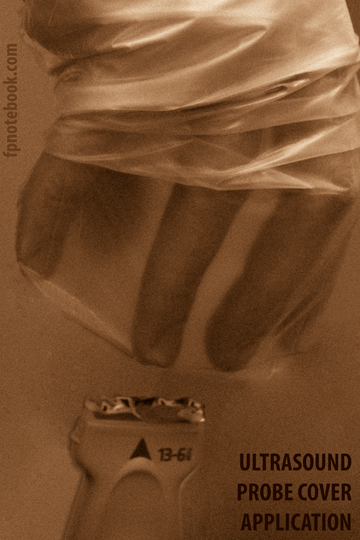
- Prepare Ultrasound transducer for sterile technique
- Images
- Prior to gowning and gloving
- Reapply non-sterile gel to Ultrasound transducer (while it sits in holder)
- Position the Ultrasound machine in front of you and to your right side
- After gowning and gloving and after preparing Central Line (see below)
- Open sterile probe cover package on sterile field
- Position the sterile cover with the "well" (inside of bag) facing down
- Insert non-dominant hand onto the "well" and push hand through
- Transfer the cover to the dominant hand, grasping the inside of "well"
- Grasp the pre-gelled transducer probe (from above as it sits in its holder) through the cover
- Lift the transducer probe out of its holder so the transducer and cord are held in mid-air
- Slide the cover over the transducer and cord, stripping the cover of air
- Tap/compress the sterile cover against the pre-gelled transducer to eliminate air bubbles
- A smooth layer of gel should remain between the probe cover and the transducer
- Use sterile Rubber bands to fix the sterile cover to the underlying transducer probe
- Apply each of 2 sterile Rubber bands to the cover overlying the body of the transducer
- Precautions
- Sterile transducer and cord cover is essential to reduce the risk of infection with Central Line Placement
- Any bubbles between transducer and skin will markedly decrease the quality of the Ultrasound image
- Sterile cover makes the transducer and cord very slippery
- When not being held, place the $10,000 transducer in a secure location
- Should not be in a position where it will slide, fall, and break
- When done with placement, hand off the transducer to an assistant
- Images
- Technique of Ultrasound-guided needle placement
- Consider using 18 gauge long angiocatheter in Central Line kit (see description below)
- Hold the Ultrasound transducer in non-dominant hand
- Needle insertion is performed with dominant hand
- Transducer is in short axis (transverse) with indicator facing left (patient's 3:00 position)
- Long axis is rarely possible in the neck due to inadequate space (except for guidewire confirmation)
- Oblique technique allows for some features of both short and long axis
- Transduce oriented with indicator pointing toward 4-5:00 (between short and long axis)
- Phelan (2009) J Emerg Med. 2009 37(4):403-8 [PubMed]
- Position Jugular Vein in midline of Ultrasound image
- Insert needle at midline of transducer (typically near apex of sternocleidomastoid)
- Direct needle such that it is not in-line to strike Carotid Artery (toward ipsilateral nipple)
- Advance needle with jack hammer technique
- Small ocillations of forward movement enhance the visualization of the needle
- Small foward movements decrease possibility of entering posterior vessel wall
- Observe needle enter vessel
- Needle tip typically enhances with hyperechoic line
- Gentle insertion decreases risk of striking posterior internal jugular wall
- Confirm guidewire placement prior to dilation and catheter insertion
- Use long axis (with indicator away from you toward patient's feet or 6:00 position)
- Visualize the guidewire within the internal Jugular Vein
- Technique
- Right internal jugular central venous catheter insertion
- Position patient in trendelenburg position (head angled down toward floor)
- Lower risk of Air Embolism
- Engorges vessels and allows for easier visualization
- Patient head rotated 15 degrees away from side of procedure
- Avoid over-extension and over-rotation of the neck
- Preparation of the catheter
- Flush all three central venous catheter lumens with Normal Saline
- Flushing lines is preferred to aspirating as low volume may result in line collapse on aspiration
- Preparation of skin
- Perform Ultrasound machine preparation and pre-scanning as above
- Position head extended and turned away from the insertion site
- Apply Hibiclens to a wide area over the anterior-lateral neck
- Drape the neck to shield all but the prepped skin
-
Local Anesthetic
- Clear any air bubbles in a syringe of Lidocaine 1% without Epinephrine
- Air bubbles will markedly decrease quality of Ultrasound image
- Inject Lidocaine 1% without Epinephrine at the entry site
- Raise a skin wheal at insertion site
- Infiltrate along expected needle insertion tract
- Aspirate prior to injecting to prevent intravascular injection
- Clear any air bubbles in a syringe of Lidocaine 1% without Epinephrine
- Needle insertion site
- Use Ultrasound localization technique described above
- Insertion site
- Insertion site will be lateral to palpated carotid pulsation
- Approximately at top of triangle formed by sternocleidomastoid Muscles bodies and clavicle
- Caution
- Internal Jugular Vein positioning is variable
- Ultrasound guidance is far preferred as landmarks are unreliable
- Avoid inserting needle through the sternocleidomastoid Muscle (Hematoma risk)
- Landmark triangle (insertion is at the apex of triangle, where two bodies of SCM meet)
- Landmarks by finger breadths
- Three fingers lateral to midline trachea
- Three fingers superior to clavicle (approximate level of cricoid ring)
- Needle insertion
- Needle types (either is attached to a 10 cc syringe)
- Steel Needle 18g (standard, more rigid)
- Angiocatheter 18g - long (alternative to steel needle)
- Angiocatheter (18 gauge) is typically included in the Central Line kit
- Once in lumen, remove needle and thread wire through catheter
- May be easier to maintain catheter within vessel lumen while threading guide wire
- In large patients, angiocatheter may be too short to access the vessel lumen
- Needle is directed toward nipple on side of insertion
- Insert needle at 45 degrees to the skin plane (when using Ultrasound guidance)
- Landmark insertion (without Ultrasound) is typically at a 30 degree angle to the skin plane
- Advance needle as described above under technique of Ultrasound-guided needle insertion
- Internal jugular is typically superficial (2-3 cm depth from skin surface)
- Aspirate while inserting needle
- Advance the needle another 0.5 cm past the time blood is first aspirated (to ensure in lumen)
- Needle types (either is attached to a 10 cc syringe)
- Guide-wire insertion
- Remove syringe from needle
- Occlude the open needle base to prevent bleeding and Air Embolism
- Insert guidewire
- Some recommend observing guidewire enter vessel on Ultrasound
- Typically insert guidewire until free end is approximately at the level of the patient's head
- Withdraw guidewire a short distance if ectopy seen on telemetry monitor
- Withdraw needle
- Firmly grasp guide wire
- Back out over the wire
- Adjust grasp on wire to be at skin entry site once needle is withdrawn
- Make skin nick
- Nick skin with #11 blade along the edge of the wire insertion site
- Confirm that the nick is contiguous with the space the wire lies within
- Dilator insertion
- Insert dilator over the wire and into the skin
- Do not fully insert dilator
- Only insert dilator far enough to dilate skin and soft tissue, but not vessel
- Twist the dilator to assist in advancing past resistance
- Withdraw the dilator
- Insert dilator over the wire and into the skin
- Central catheter insertion
- Always have hold of guidewire throughout this process
- Insert catheter over the guide wire via the longest, most distal port (remove brown cap)
- As catheter approaches skin, if guidewire does not emerge through port
- Withdraw the guidewire from skin until it emerges via port
- Grasp the guidewire at the distal port prior to letting go of guidewire at skin
- As catheter approaches skin, if guidewire does not emerge through port
- Advance catheter through skin to estimated depth
- Err on the side of caution by inserting further than estimate (e.g. 15 cm right, 20 cm left)
- Line may be withdrawn if inserted too far
- Line may not be inserted deeper after initial placement
- Deeper insertion requires replacement of line over another guidewire
- Typical final insertion depths (as above, insert further than these depths initially)
- Right side: Men 12-13 cm, Women: 11-12 cm
- Left side: Add 5 cm to right side length
- Err on the side of caution by inserting further than estimate (e.g. 15 cm right, 20 cm left)
- Remove guidewire
- Flush all 3 lines (all three lines should have been filled with saline in preparation)
- Confirm catheter placement
- Secure Central Line
- Portable Chest XRay
- Central Line tip should be at superior vena cava junction with right atrium
- Approximate tip position is 2 cm below the superior right heart sillhouette
- Tip will be 4-5 cm below the carina, just below the hilum
- Bedside Ultrasound
- Alternative to Chest XRay for line confirmation
- Confirm line is not tracking superiorly (intracranially)
- Follow catheter into internal Jugular Vein and inferiorly with linear probe
- Confirm no Pneumothorax
- Confirm venous catheter placement
- Agitate Normal Saline in a syringe (mix the syringe back and forth to create microbubbles)
- Connect the agitated saline to the distal port on Central Line
- View right ventricle on Ultrasound (cardiac probe at subxiphoid or apical view)
- Flush the saline and observe the bubbles in the right ventricle
- References
- Montrief and Long in Swadron (2021) EM:Rap 21(12): 15-6
- Adjust Central Line based on Chest XRay (may withdraw, but may not insert further due to infection risk)
- Lines in the brachiocephalic or subclavian veins are tolerated well and do not need repositioning
- https://emcrit.org/pulmcrit/does-central-line-position-matter-can-we-use-ultrasonography-to-confirm-line-position/
- Suture the Central Line in place
- Resources
- Internal jugular central venous catheter placement video (part 1)
- Internal jugular central venous catheter placement video (part 2)
- Internal jugular central venous catheter placement video (ACEP Critical Decisions Video)
- References
- Abbott Northwestern Residency
- Dewitz (2012) Ultrasound-Guided Vascular Access Video, GulfCoast Ultrasound, VL-90-UGVAHD
- Hoffman - Ultrasound Guide for Emergency Physicians
- Weingart - EM-Crit: Central Lines